|
|
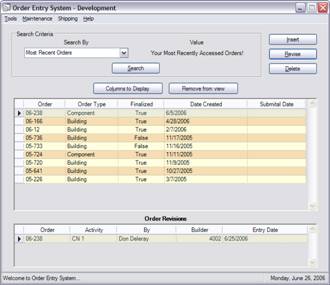
Open the Order Entry System to
begin.
- Start at the main Order Entry
screen, and Revise (double
click or highlight and click the Revise button) the order you wish to
add a Back Order to.
|
|
|
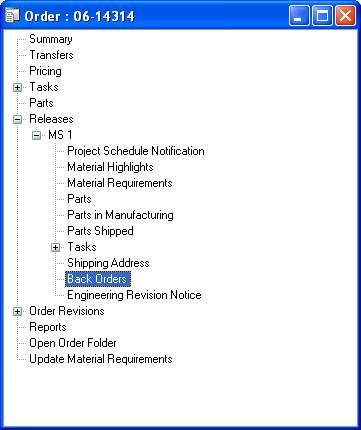
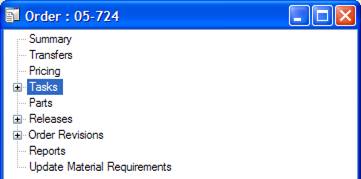
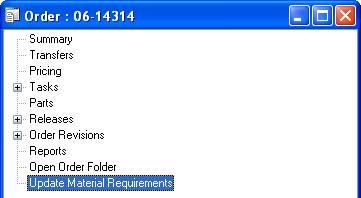
- At the Order Screen, click on
the + in front of the Releases
item.
- Then click on the + in front of
open the Activity (MS, OE, EP, etc.) you wish to add the Back order to.
- Double Click on the Back Order item.
|
|
|
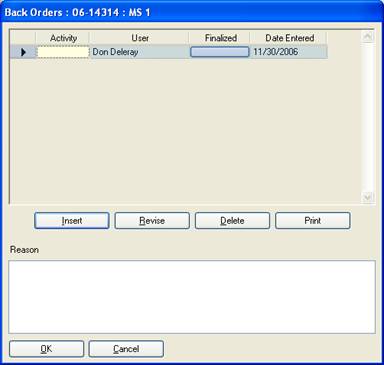
- Once the screen is active, you
can, click on Insert button
to add an Order Change screen.
- Once you have inserted the
Order Change, then you can fill in any Comments that are required.
|
|

|
- If you click on the Revise button you see this
screen. It will bring up all
the parts listed on the activity of the order.
|
|
|
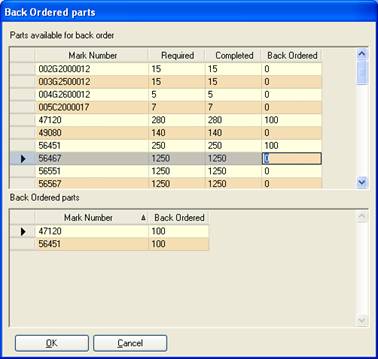
- Enter the quantities of the
items that were Back Ordered in the Back Order column.
- When you are complete, click on
the OK button.
|
|
|
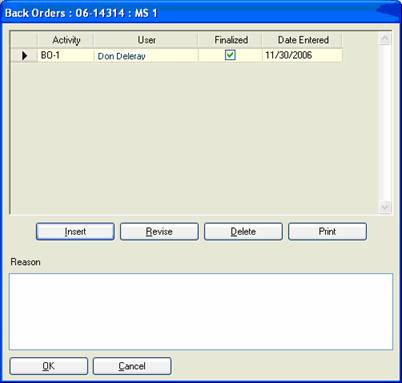
Note: Once a Back Order is Finalized you CANNOT
make any more changes or add any more parts to it!
- Once all information is added,
then you will click on the Final button
to Release the order to the builder for his electronic approval.
Note: At any time you can add reason or
Comments to the tabs below.
|
|
|
- Once all information is
complete, it will provide a check mark at the Finalized column.
- When complete, click on the OK button.
Note: If required, you can use the Print button to get a copy of the
Back order to email or send to the shop and Production Control.
|
|
|
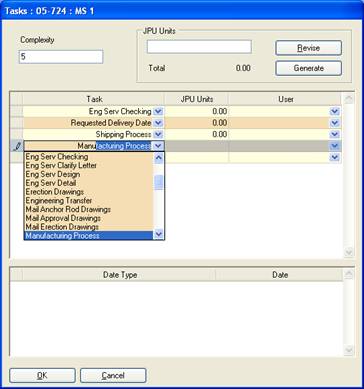
- Open the Tasks item, by clicking on the item.
|
|
|
- At the Task Dates screen, click on the dropdown to enter the Manufacturing Process Date type.
|
|
|
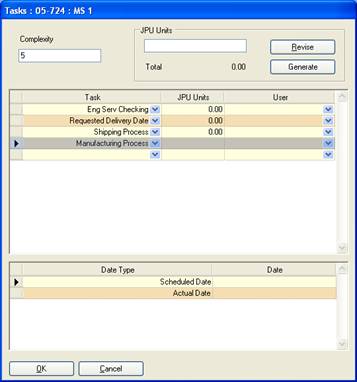
- Then click on grey button on
left of the Task, this will show the dates at the bottom of the screen
for the task.
Note:
If the Dates below are not active, then you many have to click on the Task
above, and then click on the Manufacturing Process task to get the fields to
activate.
|
|
|

|
- Click in the field, and type
the date, for December 4th, 2006 you will type 12/04/06 and
it will convert it.
- When complete, click OK.
|
|

|
- This can be done for all the
tasks listed; you do not need to exit until complete. If you need to add a new one,
follow the same process as above.
- When done click the OK button.
|
|
|
- You can click the X to close if
you are complete with the order, or perform another task.
|
|
|
|
|
|
|
|
|
|
|